Storiis Support
Scenes
Updated
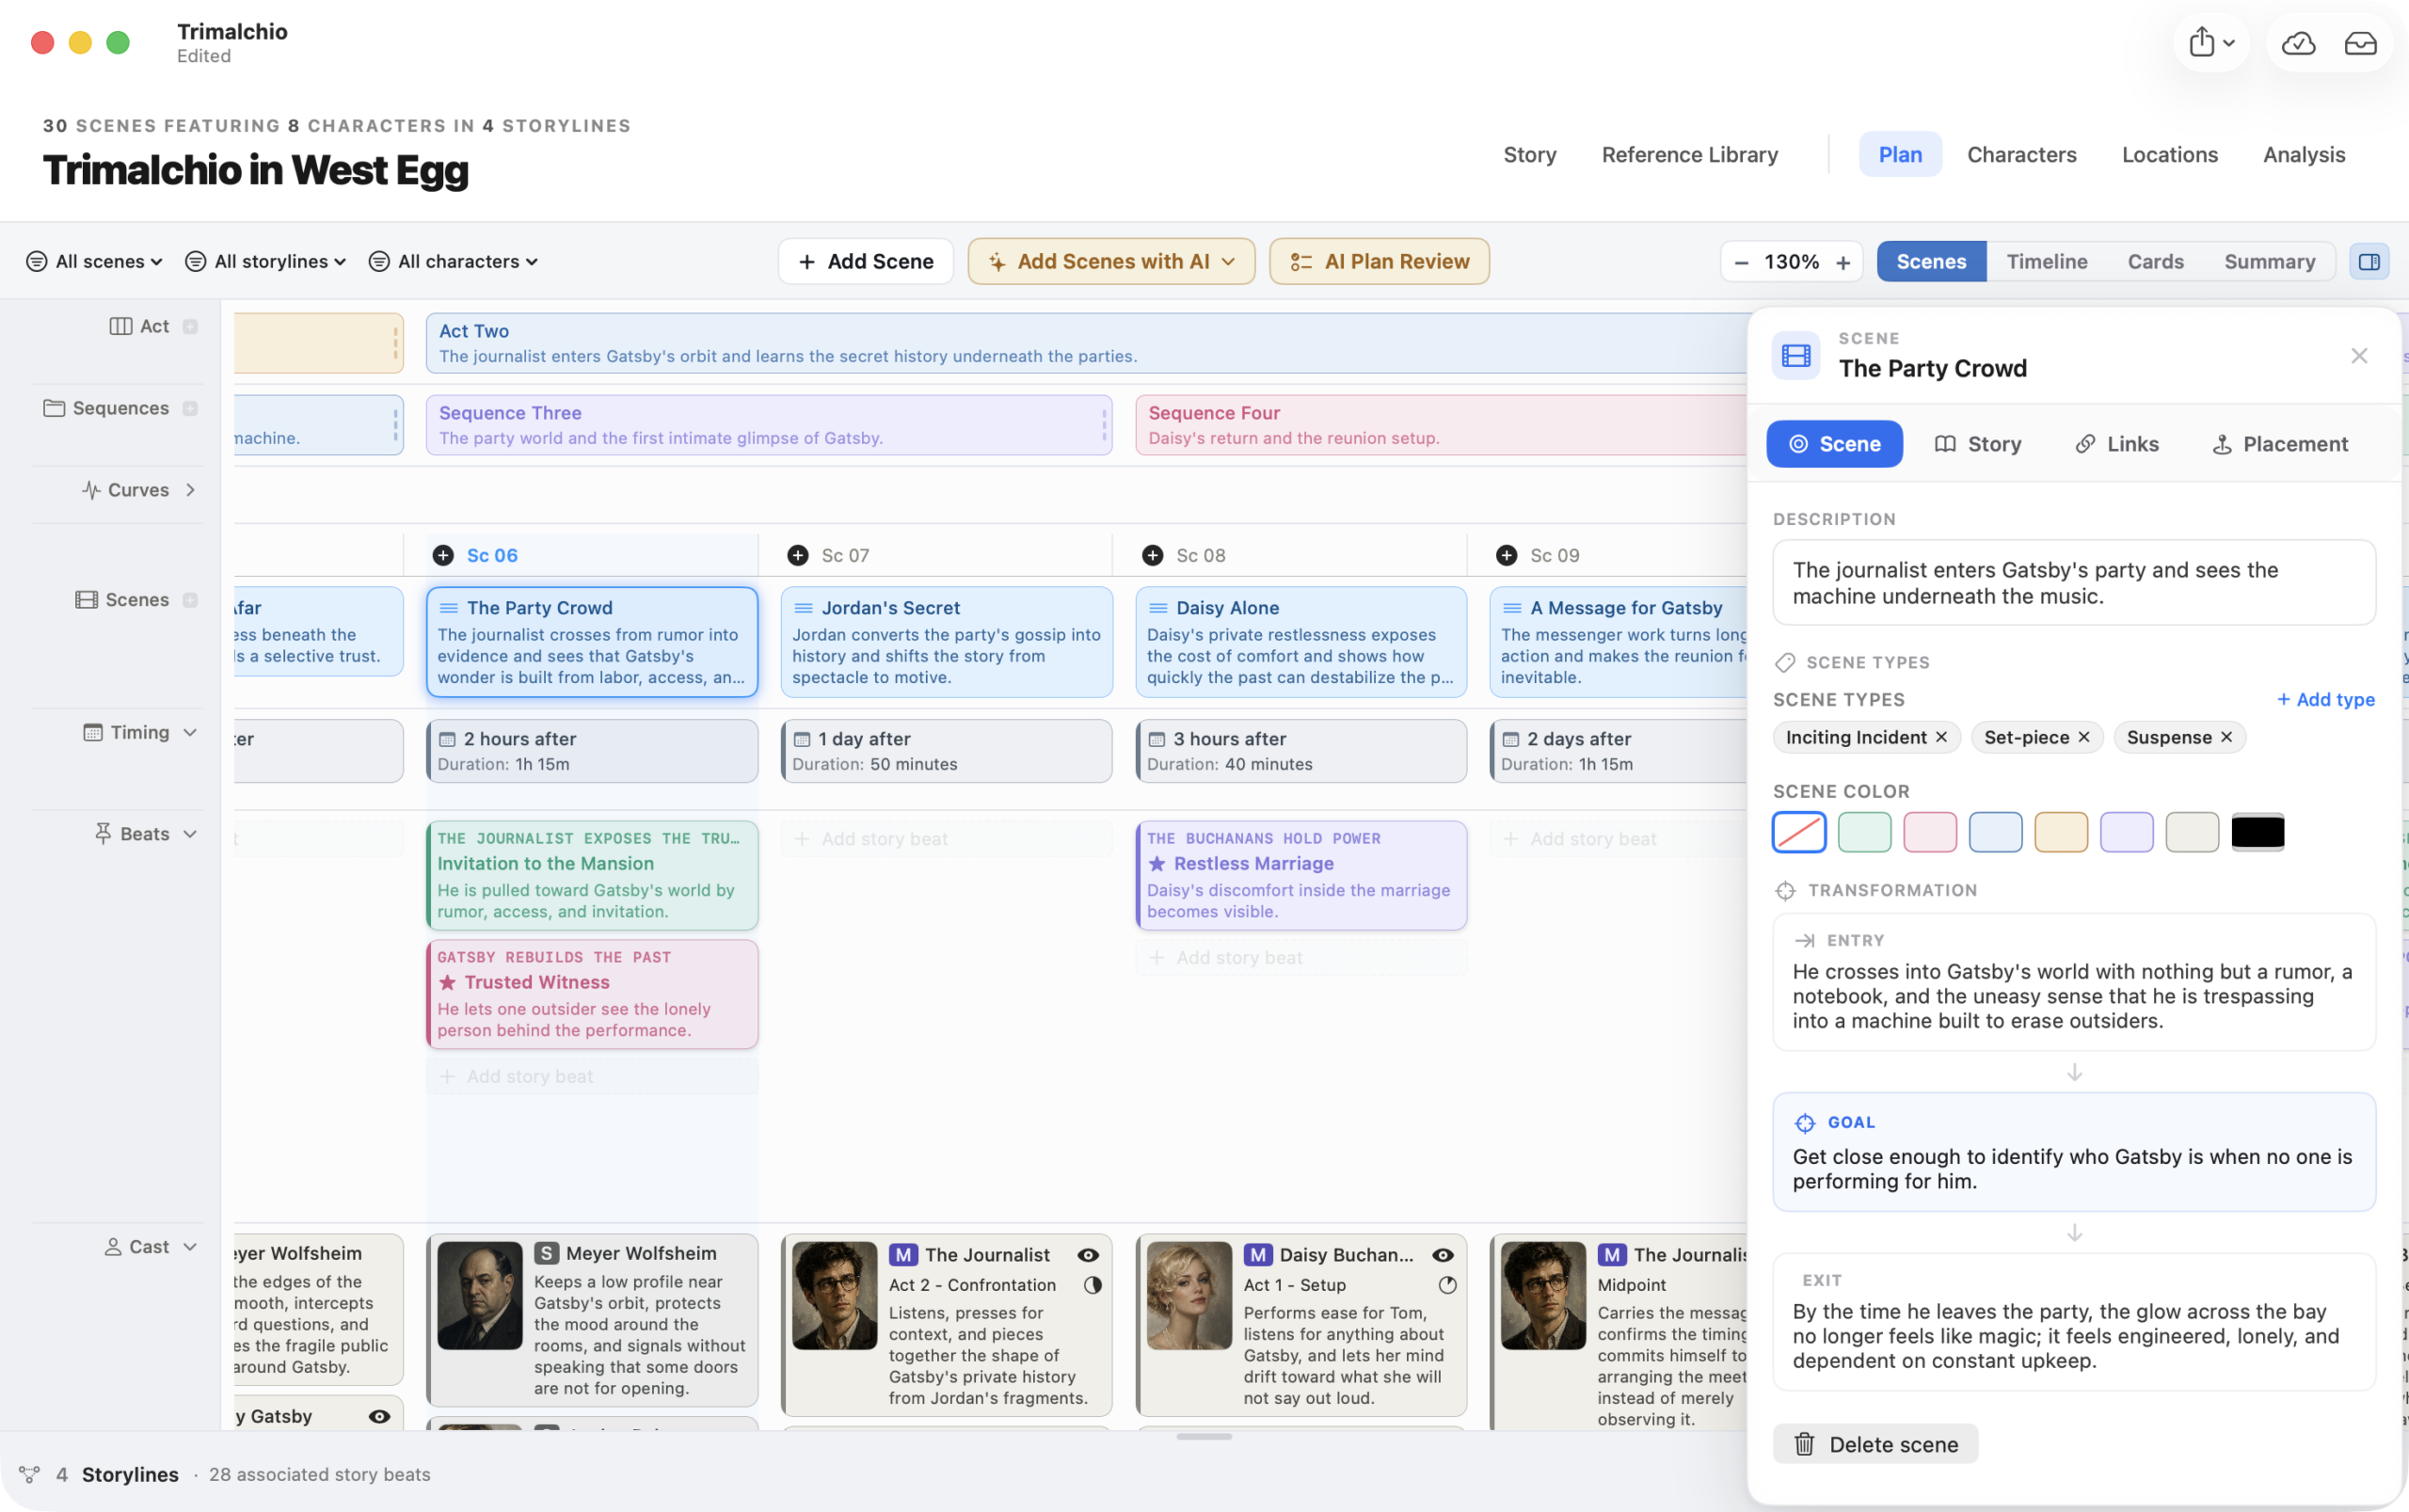
Scenes is the main construction view in the Plan. It arranges scenes from left to right in narrative order—the order your audience encounters them—and places the information connected to those scenes in rows beneath them.
This makes it possible to see not only what happens, but why a scene exists, which threads it advances and what it asks the audience to understand.
Adding a Scene
Select Add Scene in the Plan toolbar to open the Scene Wizard. You can also add a scene beside an existing one from its context menu.
Storiis does not require every field. A title and short description may be enough during early planning; you can return later as the scene becomes clearer.
The Scene Wizard
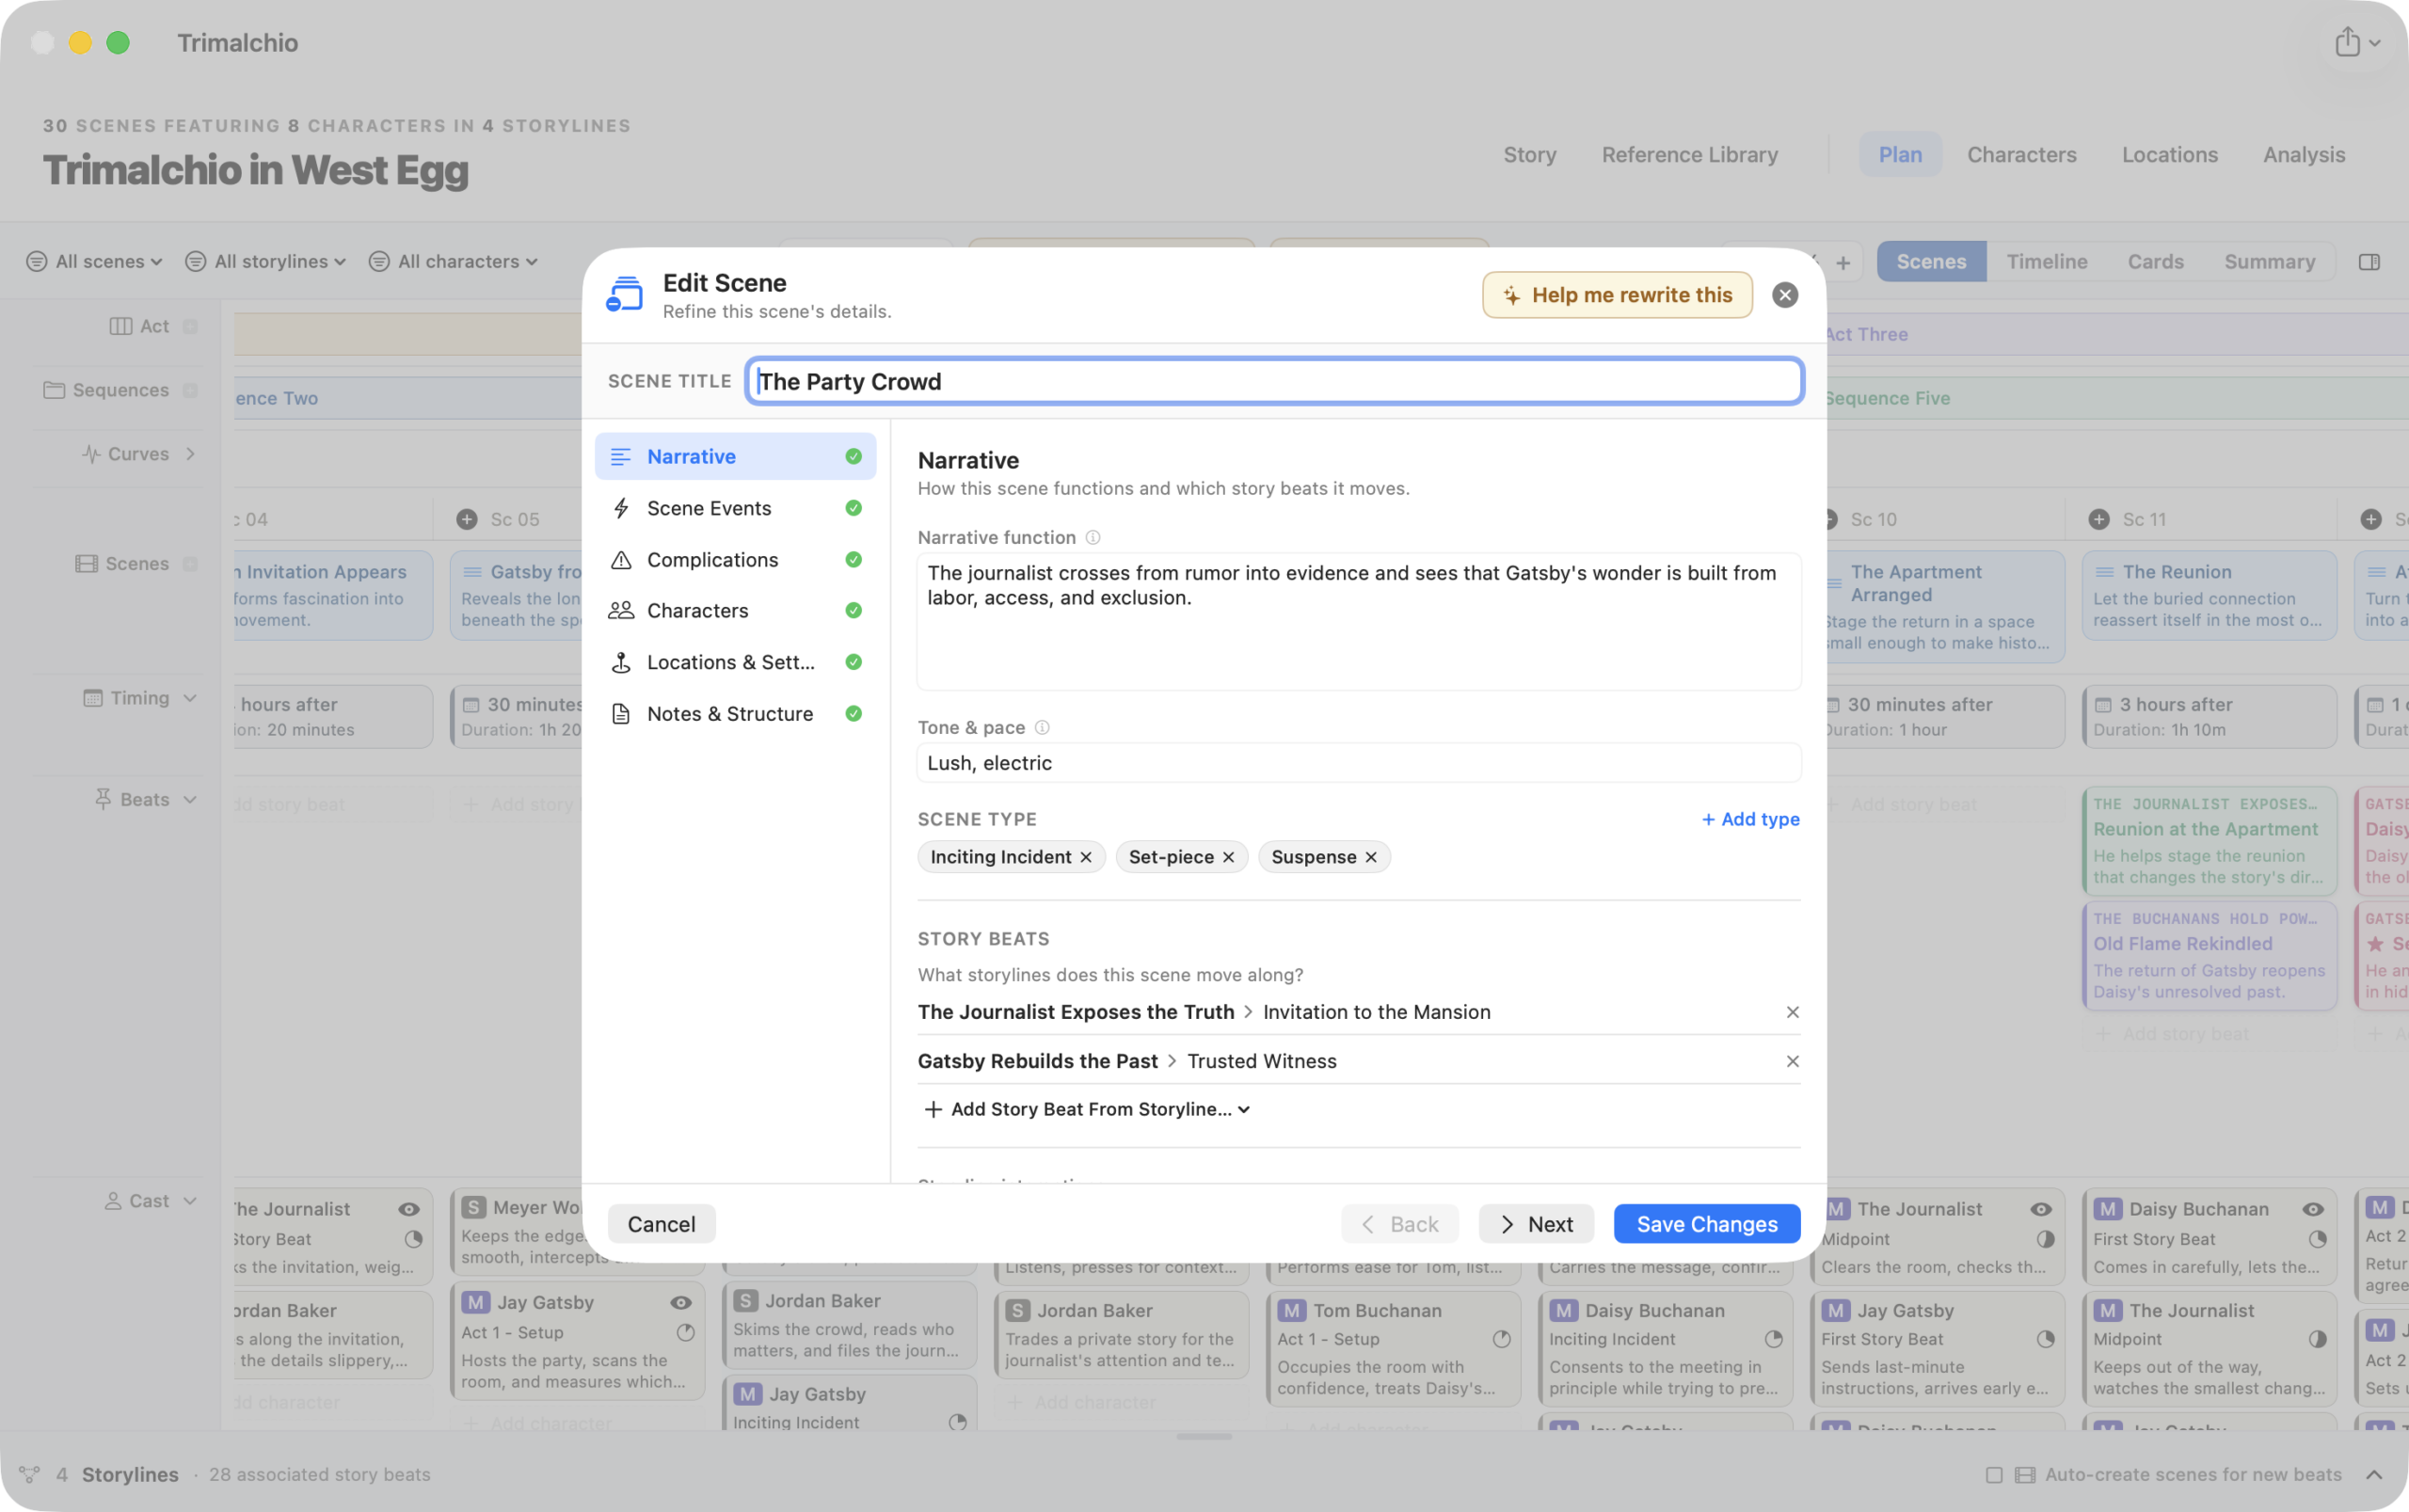
The Scene Wizard organizes scene planning into six focused sections:
- Narrative — narrative function, scene type, tone and pace, storyline interaction and story-beat assignments
- Scene Events — the entry state, scene goal, core events and exit state
- Complications — conflict or obstacle, turning point and subtext
- Characters — cast, point of view, character traits and journey developments
- Locations & Settings — timing, duration, locations and exposition
- Notes & Structure — author notes and placement within the story’s acts and sequences or chapters
Move between sections in any order. The list also makes missing areas visible without treating them as errors.
Narrative Function and Core Events
Narrative Function describes the scene’s job in the story. Core Events describe the events that perform that job.
For example, “force the sisters to choose opposite sides” is a narrative function; the argument, discovery and final decision are core events. Keeping the distinction clear helps prevent a scene from becoming a beautifully detailed room in which nothing changes.
Connecting Story Beats
A scene can advance beats from several storylines. Add existing beats under Story Beats, and mark one as Primary when it is the main reason the scene exists.
You can create or organize the storylines themselves in the Storylines panel. See Storylines and Story Beats.
Characters and Point of View
Add the characters who appear in the scene and choose a point-of-view character where appropriate. Scene planning can also capture character traits and journey developments that matter at this moment.
If you discover that the scene needs someone new, you can create the character from the planning flow and develop the full profile later in Characters.
Locations and Exposition
Locations and exposition can be connected directly to a scene.
Exposition comes from canonical facts in the Reference Library. Marking a fact for use in a scene creates a deliberate reveal: you are deciding not merely that something is true in the world, but when the audience learns it.
You can also create a location while planning and return to Locations later to add images and details.
Scene Timing
Timing describes when a scene happens relative to another scene—or relative to the start of the story for the scene that begins the chronology. Duration describes how much story-world time the scene occupies.
Timing does not determine narrative order. A flashback may appear late in the Scenes view while occurring years earlier on the Timeline.
Acts and Sequences or Chapters
Assign each scene to an act and, when useful, a sequence or chapter. These structural groups appear throughout the Plan and in several exports.
Use Scenes → Group Scenes by to choose whether the second level is called Sequences or Chapters. Choose the language that matches how you think; no one is waiting with a clipboard.
Editing on the Canvas
The rows beneath each scene expose connected Plan data. Depending on the item, you can add, remove, open or inspect it without reopening the entire Scene Wizard.
Select an item to use the inspector. Turn off Scenes → Open Inspector on Selection if you prefer selection without automatic inspection.
Coloring Scene Columns
Open Scenes → Tint Scene Columns to choose what the colors across the Plan represent. The same choice applies to scene columns in Scenes, scene items in Timeline and scene cards in Cards.
- None keeps connected items in their usual row colors. Scene headers can still use their own assigned colors.
- By Scene Color carries each scene’s assigned color through its entire column.
- By Storyline Color uses the color of the storyline behind the scene’s primary story beat. If no beat is marked Primary, Storiis uses the first connected story beat.
- By Sequence Color uses the color of the sequence or chapter containing the scene.
- By Act Color uses the color of the scene’s act.
- By Tension uses the scene’s AI Story Curves tension score. Calmer scenes begin in blue, then move through cyan, green, yellow and orange toward red at peak tension.
If the selected source has no color—or a scene has no tension score—its item appears neutral grey. This makes missing information distinguishable from turning column tinting off.
The Two Tension Scales
By Tension becomes available after Story Curves has scored the Plan, provided AI features are not hidden in Settings. The Scale Tension to Story Range switch beneath the tint choices controls how those scores become colors. It also changes the vertical tension scale in the Story Curves row, so the curve and scene colors continue to agree.
With Scale Tension to Story Range off, Storiis uses the full 0–10 scale. A score near 0 is blue and a score near 10 is red, with the same score producing the same color in every story. This is the default and the better choice for judging absolute intensity or noticing a story whose tension remains in a narrow band.
With Scale Tension to Story Range on, the lowest scored scene in this story maps to the calm end of the color range and the highest maps to the peak end. This makes the story’s internal rises and falls easier to see, especially in a deliberately quiet story. Red now means “highest tension in this story,” not necessarily “10 out of 10.”
If every scored scene has the same tension—or only one scene has a score—Storiis falls back to the fixed 0–10 scale because there is no story range to stretch.
Reordering and Context Menus
Drag scene columns to change narrative order. Context menus provide actions such as opening a scene, inserting another scene nearby, duplicating or deleting it and editing its timing.
Reordering a scene changes where the audience encounters it. It does not automatically rewrite its timing, so check the Timeline after moving flashbacks, flash-forwards or tightly connected events.
Filters
The toolbar can filter by scene, storyline and character. This is useful when tracing a subplot or a character’s appearances through a crowded Plan.
Filters can also affect what appears in Plan summaries. Clear them when you want to inspect the entire story.
AI Assistance
Add Scene with AI
Starts a guided Scene Wizard for one new scene. Storiis uses the surrounding Plan and your existing story material as context, estimates the credit cost before the request and lets you review the result before saving it.
Brainstorm All Scenes
Proposes a broader scene plan from your Story, characters and storylines. You choose the scope, inspect the proposed cards and decide what to add.
AI Plan Review
Examines the current Plan and available analysis findings, discusses structural problems and can prepare specific changes. Nothing is applied until you approve it, and accepted revisions are grouped so they can be undone.
For a guided example, see Example AI-Assisted Workflow.